CleverPush currently supports single sign-on (SSO) via SAML 2.0. The following instructions will show you how to setup SSO with Microsoft Entra ID (previously Azure AD) and with Google.
Microsoft Entra SSO Setup
CleverPush Side:
1.1. Navigate to teams settings and add new SSO integration:

a) Filling data:
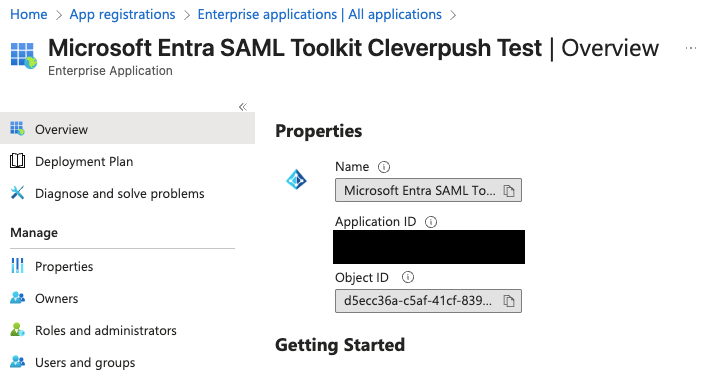
- Application (client) ID – can be found inside of Microsoft Entra application page – On Entra side: (Enterprise applications/All applications) Application ID
- Microsoft Service Principal ID – can be found inside of Microsoft Entra application page – On Entra side (Enterprise applications/All applications) Object ID

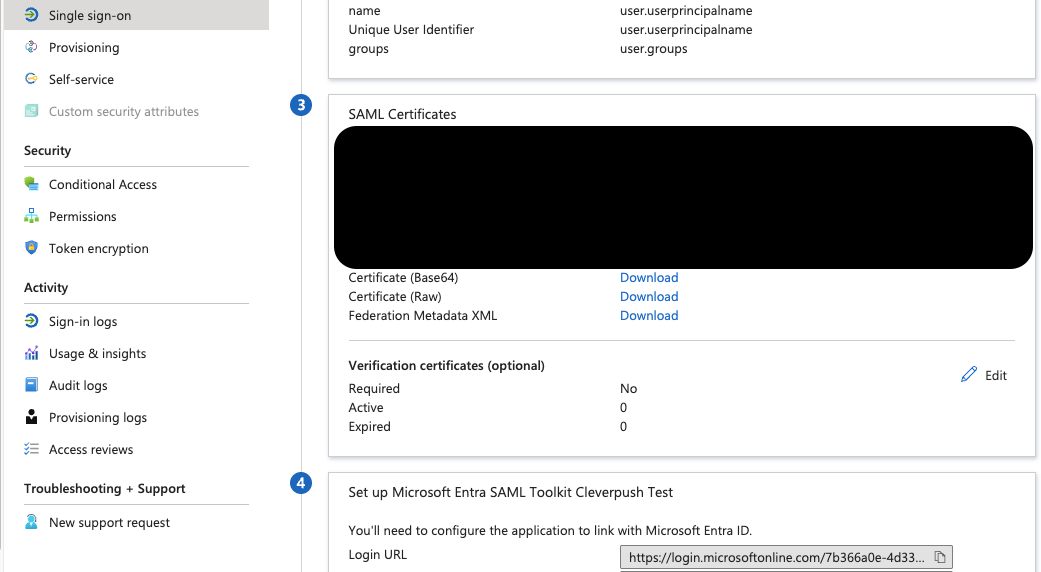
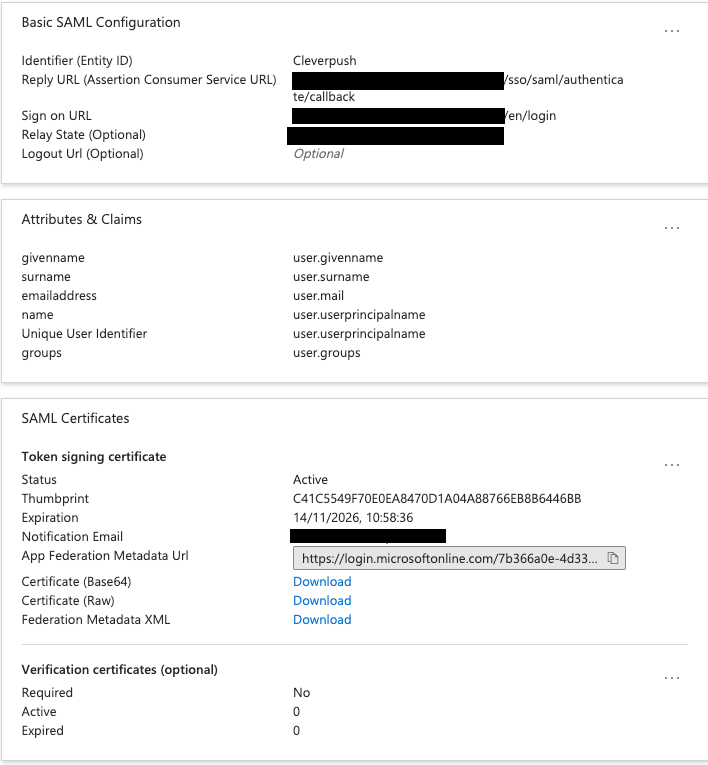
- Issuer – can be found inside of Microsoft Entra application page on Single sign-on sidebar – at the very bottom of Single sign-on settings -> Login URL
- Issue Identity Provider – can be found inside of Microsoft Entra application page – On Entra side: (Enterprise applications/All applications) Application ID
- Certificate – can be found inside of Microsoft Entra application page on Single sign-on sidebar – in the middle please download Certificate (base64) and extract certificate between BEGIN CERTIFICATE and END CERTIFICATE LINES

1.3. After filling up necessary fields like:
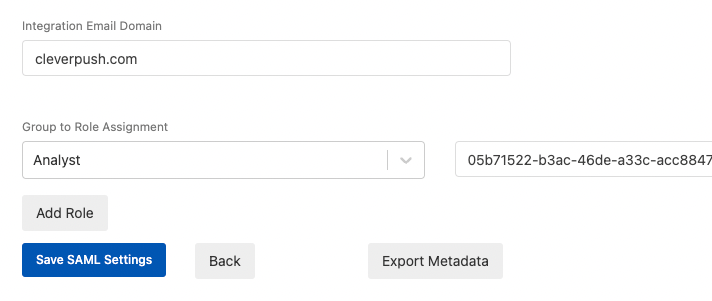
a) Integration Email Domain (domain with which subscribers will connect Microsoft accounts with CleverPush, i.e. cleverpush.com, etc…),
b) Group to Role Assignment (groups that can be used in teams – Tester, Analyst, Editor, Administrator)
we move to exporting metadata, which will be helpful setting up Microsoft Entra SAML settings (1.3 in Microsoft Entra Side)
After creating application in Microsoft Entra we need to fill final data from Single sign-on setting page to CleverPush Integration settings:
a) Issuer Identity Provider &
b) Issuer
both of which we can get from Microsoft Entra

1.4. After finishing filling up necessary settings, save SAML integration and move onto a team settings with which SAML integration should be connected with – scroll down to almost very bottom and select integration (recently created)

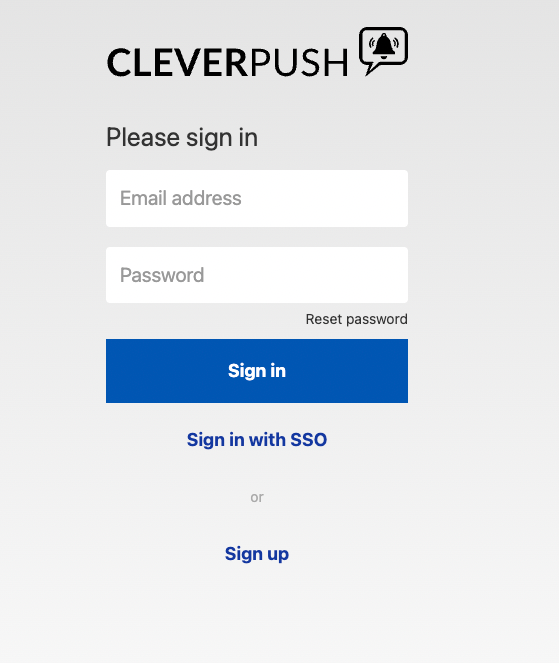
1.5. Login Page functionality:
Press Sign in with SSO → After imputing EMAIL or DOMAIN → You will be redirected to IdP (identity provider) connected with specific SAML Integration Settings.

Microsoft Entra Side:
1.1. Firstly, after creating New Application in Microsoft Entra we need to set up our Single Sign-on Settings
1.2. Secondly, move to Single sign-on settings which you can see inside of the left-side panel:
Inside those fields we should specify
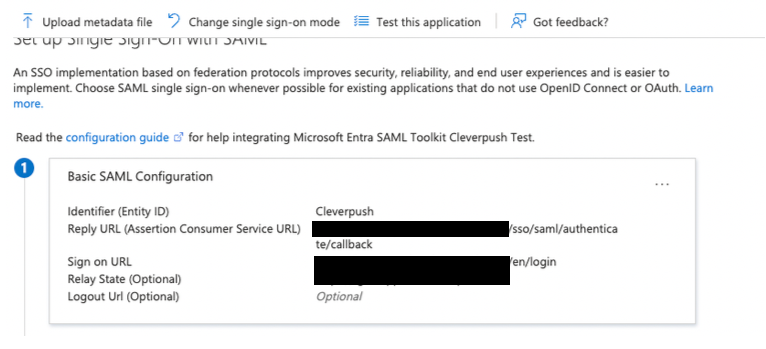
1. Reply URL – https://app.cleverpush.com/sso/saml/authenticate/callback
2. Sign on URL – https://app.cleverpush.com/en/login
3. Relay State – https://app.cleverpush.com
Inside of settings we need to specify fields necessary for SSO to work.
1.3. We can additionally import Metadata which was previously exported from Cleverpush Integration Settings – button at the top
1.4. Additionally, while selecting groups connected to SAML integration in CleverPush, we also need to specify them here.
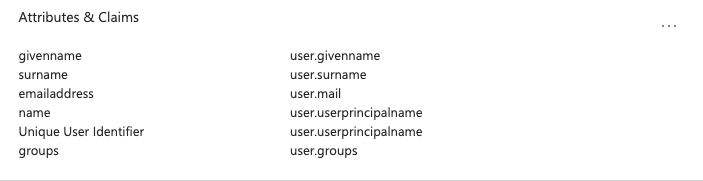
a) specify attributes/claims to include groups in SAML response from Microsoft Entra side:
b) From left-side tab – select users and groups tab
c) Create new groups inside of it, and assign users which are to be included inside of group/application

Afterwards, after successfully creating new user via SSO → User will be assigned to specific team (integration settings’s related) with previously set up role (in CleverPush/Microsoft).
Google Business SSO Setup
Google Business side:
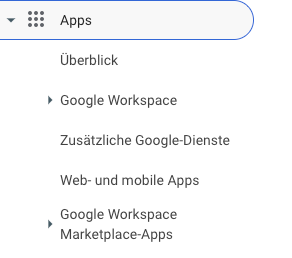
2.1. Add an Application on your Google Business Admin Panel – left Side →
a. Move to Apps
b. Navigate to Web and Mobile Apps →
c. Create a new Application
2.2. Create a new SAML App
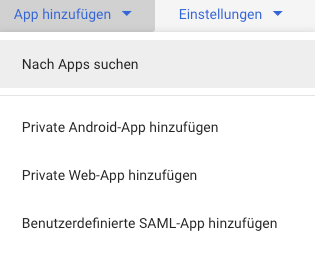
a. Follow the steps from Google side → Remember to save the SAML data (you can do it later from settings, but it is crucial to set up the CleverPush Side)
Name: Which should be specified from Google Side → Choose an E-Mail

b. Assuming you had already CleverPush Integration settings, you downloaded Metadata from our side, you did finish Google setup, therefore, we need to allow organisation users to connect with this application:
B1. Go to your recently created SAML application, and at the top change auth settings:

It has to be changed to “available for all”.
B2. Additionally, you can specify which groups/organisations will have access to the application:

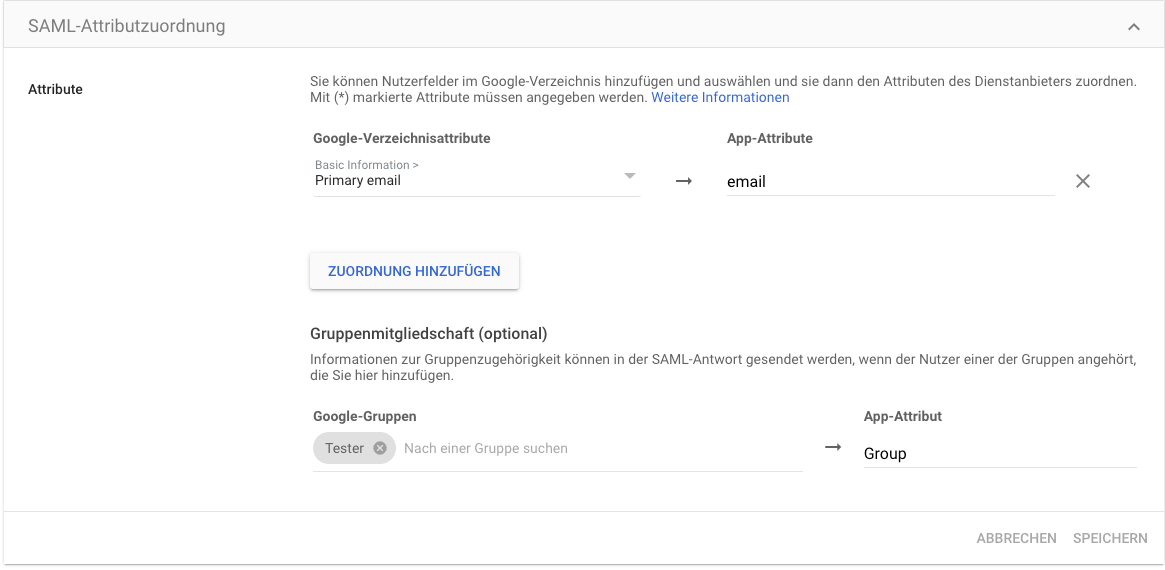
c. Create new claims – for CleverPush to understand position from which Google is coming from (that is → setup new user Data → groups / informations)
C1. After moving again to Web and Mobile Apps → your application → We can add attributes to SAML response →

It should basically look like this, we can Specify email/first-/last-Name, etc. And most importantly, groups →
from Google Business side → we specify the group, add users to it, and give it a name (which will be used to find appropriate group inside of CleverPush application.
CleverPush side:
It is basically the same as for Microsoft Entra ID, please scroll to the top to see the detailed instructions.
Unstead of group ID as in Microsoft, we give Name of the group inside of CleverPush settings.